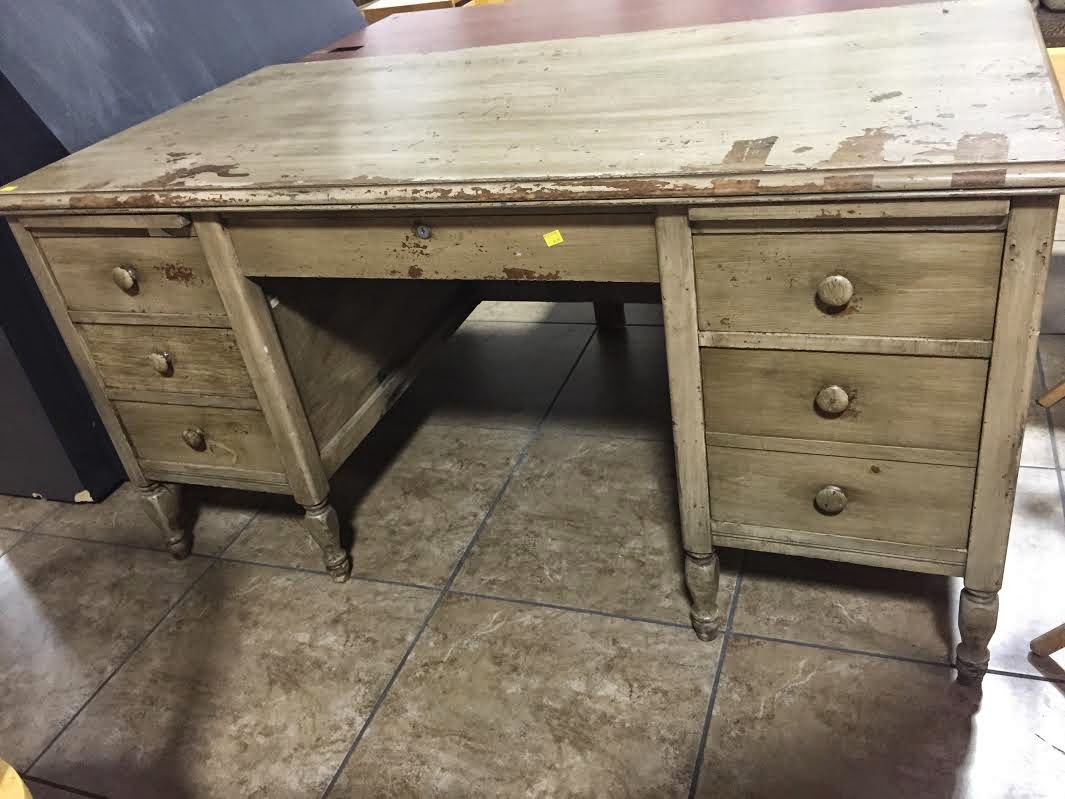
Well, I work from home and I have been searching for a proper desk to finish off my “Home Office!” I stumbled upon this HUGE, OLD , WOODEN desk at a thrift store in the town where I live and at first glance I said “ew” HAHA! However, I circled back around and noticed that it was REAL wood and SUPER HEAVY! And if you know anything about furniture prices you know that a NEW desk like this would be around 300 dollars! THIS ONE WAS $7.00!!!!! So, I decided I would RE-FURBISH!
It was a SAGA getting it into the car! My husband and I BOTH drive very small cars! I personally drive a Volkswagen beetle….this desk is AS BIG AS MY CAR! We were lucky enough to come across a wonderful woman who offered to drive it to our house 🙂 The kindness of strangers NEVER ceases to AMAZE me! We made a donation to her church when we got home 🙂
SO, I had a big, old , ugly desk ! Where did I look first ? PINTEREST!!!! I found this picture for inspiration…..
 I said…I CAN DO THAT. And folks, when I get an idea in my head …IT IS GETTING DONE. HAHA! I went right to Home Depot showed this picture to the guy behind the counter and I walked out with these things:
–3 paint brushes (just the .99 cent kind)
— 1 pint of cream paint
–1 pint of baby blue paint
–1 pint of dark wood stain
–Sand paper block
–Martha Stewart drawer handles (they were on special)
(the cheapest version of it all! ) TOTAL Home Depot Cost: $59.87
Then My wonderful husband took the desk apart for me in the garage and I spent 3 hours sanding and scraping and painting and staining!!!! It was SO FUN !
STEP ONE: SCRAP all old paint OFF and sand to make for a smooth coat of paint (IF we are being honest here, I didn’t do this ALL THE WAY. I am NOT a perfectionist !!)
STEP TWO: Water break!!! HAHA! Sanding is NO JOKE! Your arm and hand will hurt!
STEP THREE: IF you are doing separate colors on your piece, make sure you take the desk apart! All you need is a simple screw driver!

STEP FOUR: If you are going to stain anything, MAKE SURE you do that FIRST THING! The stain will take a while to dry! Usually 24 hours but if you live in a humid climate it could take up to 48 hours!
STEP FIVE: After you have sanded off all the edges and extra paint put on your first coat!!! HAVE FUN WITH IT! Put paper down on the ground so you don’t have to scrap paint off the garage floor 😉
STEP SIX: PAINT, PAINT, PAINT!!!!!!!!
STEP SEVEN: WAIT …..This hardest part for me 🙂
I must have checked on this desk 5 MILLION times! HAHA! In the morning , I opened up the garage door and let the sun hit the top of the desk!
A few key points: I got the CHEAPEST of all the things ! 🙂 The paint was “Home Depot” brand and the different nobs I purchased where on sale for $2.99 a piece . I AM IN LOVE with this desk for a number of reasons……..
1. It was cheap
2. I made it
3. Its unique
AND DRUM ROLL, PLEASEEEEEE


this is awesome 🙂 Before having my 2 boys I would refinish (paint) about 40 pieces of furniture a week!! It was a passion turned money maker!! so I applaud you for following through and finishing!! Good on you girl 🙂 I LOVE finding and finishing furniture!! though it has been on the back burner for a while now since I became a mom and COACH !! 🙂
this is awesome 🙂 Before having my 2 boys I would refinish (paint) about 40 pieces of furniture a week!! It was a passion turned money maker!! so I applaud you for following through and finishing!! Good on you girl 🙂 I LOVE finding and finishing furniture!! though it has been on the back burner for a while now since I became a mom and COACH !! 🙂